Rich Starley Interior Design Studio
  • Home
  • Projects
    • Residences >
      • Paseo del Mar
      • Pelican Point
      • Pelican Crest
      • Newport Coast
      • Rancho Cielo
      • Manhattan Beach
      • Stonefield Estates
      • Coto de Caza
      • Morgan Estate
      • The Strand
      • Audio Visions
      • Via Margarita
      • Sarasota
      • Newport Coast 2
      • La Quinta
      • Balboa Island
      • Dallas Texas
      • Palos Verdes
    • Rooms >
      • Entries
      • Kitchens
      • Dining Rooms
      • Living Rooms
      • Bedrooms
      • Bathrooms
      • Family - Bonus Rooms
      • Libraries
      • Theaters
      • Outdoor Living
      • Remodel Projects (before and after)
  • Services
    • What We Do For You
    • How We Work
    • Services Provided
  • The Studio
    • The Studio
    • Rich Starley
    • The Staff
  • Contact
  • Links
  • Blog
  • Custom Furniture
(562) 987-3787      Rich @RichStarleyIDS.com

How to select an interior designer

1/15/2015

 
Selecting the right interior designer for your home will make all the difference in the success of your project. In this article we’ve put together 6 vital decision points on how to select the very best interior designer:

Choose a designer with the ability to understand your lifestyle and turn your design concept it into a reality that enhances it:

Your lifestyle in your home is as unique as you are and many important factors must be identified. For example, do you have kids? and/or pets? Do you enjoy entertaining often?…  There are many important lifestyle questions to be answered, each of which will have an impact on your design project.

A great designer is able to identify your lifestyle, and will then show you how to pick elements and products which will enhance the enjoyment of your home according to your specific desires. He will adhere to the rule ‘form follows function’ and select elements which fit your lifestyle and the space they’re working in.

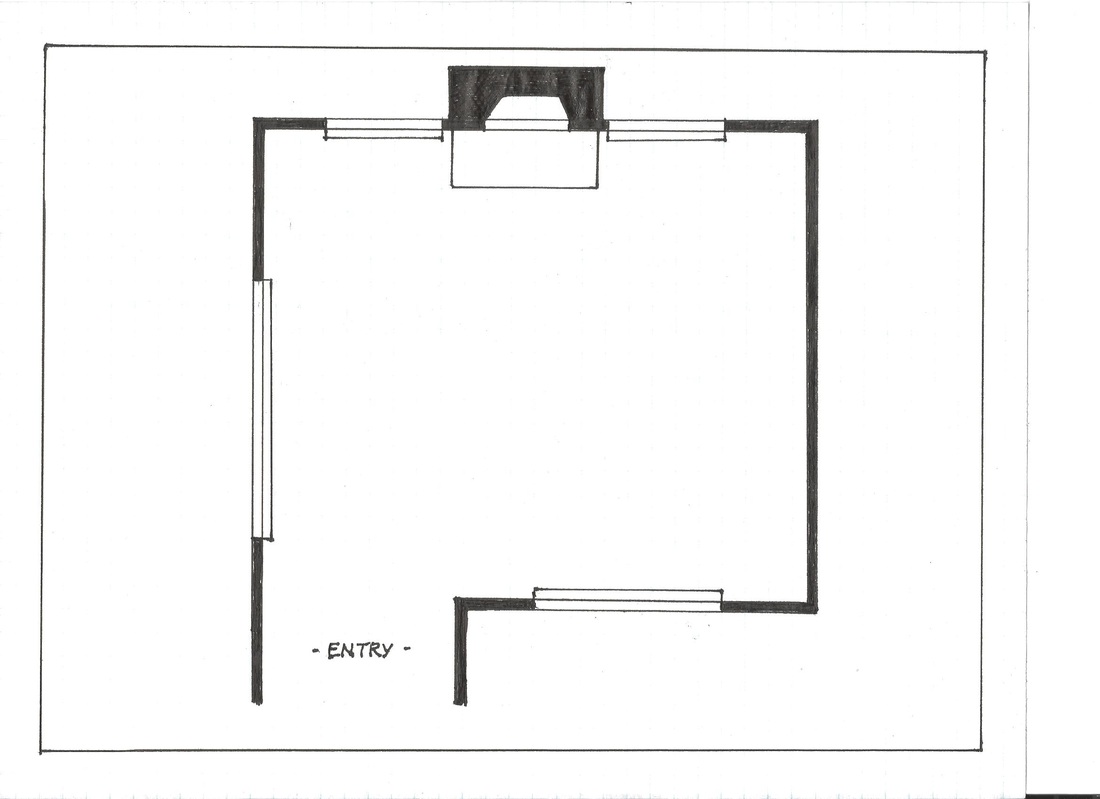
Furthermore, identification of your lifestyle works its way into each aspect of the project, starting with a proper space plan, all the way through coordinating each step, so that the finished product not only fits your lifestyle, but enhances it as well.

Don’t choose a designer based on lowest cost:

They say “Things are cheap for a reason” – and it is just as true with interior design as it is with other things.

A great designer helps you develop a budget upfront so you know where you want to go with the end project. The process of creating a budget for your project is best done by a designer with many years experience, and who also has strong relationships with suppliers and other contractors who can fulfill orders on-time and within budget.

Select a designer who can educate you on the multitude of options available:

A great designer will educate and inform to help you make the right decisions on products, which ultimately leads to a long term solution for your interior design. Did you know that most design projects have a 10-15 year life span? For this reason, it’s critical to choose an interior designer who will guide you through each option so you’ll have maximum length of return on your design investment. He will help you make selections that will hold their age and are timeless and classic.

A great designer is aware of home fashion trends:

Home fashion trends are important in every project, but your interior designer should also keep you from making the mistake of being “too trendy” and should have a critical mind about the end use of the elements in your design project.

You don’t want to get so caught up in creating a look, that you forget about the end use, and you should choose a designer who keeps this in mind at all times.

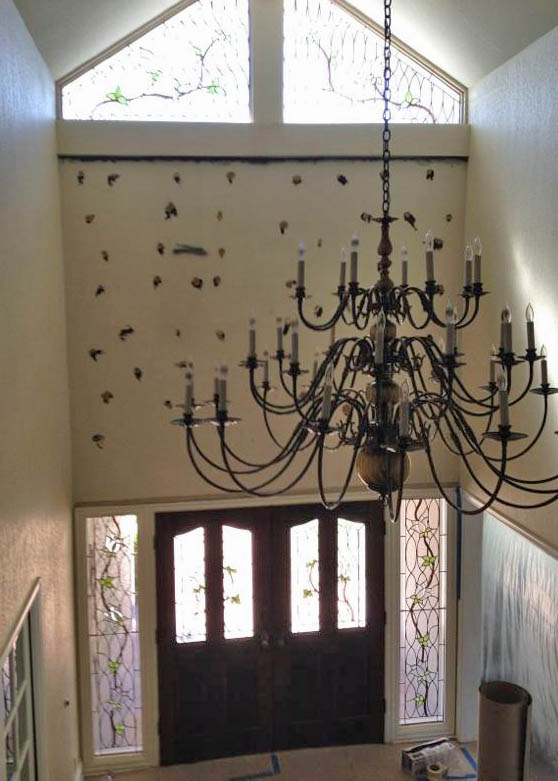
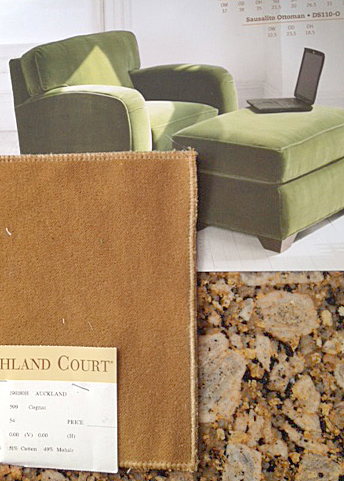
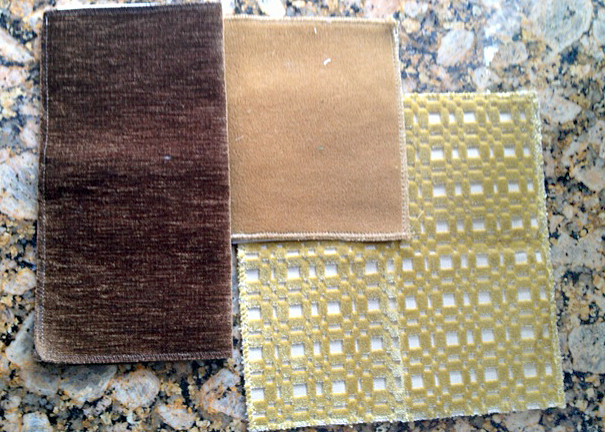
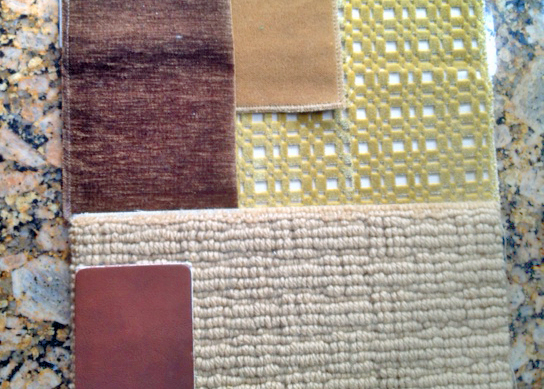
Choose a designer who understands the importance of the right finishing elements:

A great designer knows how to get you a successful outcome in the final critical step of choosing accessories. For example, when you buy a new suit or outfit, the accessories are key elements that really finish the project well! And so it is with great interior design too.

Choose a designer who can make the project fun!

Interior design does not have to be stressful.  A great designer can make the decision making process easy and fun while keeping the project on track, and managing the process so that it is enjoyable and rewarding to you.

If you’d like more information about choosing a great interior designer, Rich Starley is always here to help. Call the design studio at any time: (562) 987-3787 

Completed Project: Before & After Photos in laguna Hills

11/10/2014

 
We're ready to unveil our finished project for our client in Laguna Hills. There were multiple changes throughout the whole house, however the biggest was bringing the look from a very tired 30 year old home, up to a fresher traditional look; updated with current fabrics, color trends in terms of our finishes, current stone, and other materials for our finished products. 

The entry hall was an expansive area with a very traditional staircase, iron railing and wood handrail. My client didn't want to change this, but from a design standpoint it felt large, uninteresting and rather cold. Our solution was to bring in new wall covering and a new lighting fixture; making a dramatic impact when you first come in to the home.

Picture
Above Photo: Entry before with large mirror above the front door.


Right photo: Entry after project completion.
Picture
Our next biggest transition area was our kitchen where we had to work with 1930s style construction cabinetry. Since the client did not want to replace these, but did want a new look, we accomplished this by using a faux finish - ('faux' meaning a technique designed to replicate real wood or other material but done with paint in this particular case).

The new countertops were in granite, and the backsplash was a copper tile. We also provided new paint and furnishings.

Picture

Above Photo: Kitchen before 


Right photo: Kitchen after project completion.
Picture
Picture

In our family room we provided a new entertainment area which we incorporated a built-in fireplace, new furnishings, and the complete refinish and reface of the existing bar. We used a lot of the client's personal art and accessories to give this room a very comfortable lived-in look. (Left photo)

Picture
Next, in the upstairs master suite, the master bath required the largest portion of construction for the project. Here, we were able to demo the entire bathroom and start fresh. We took a very old 1930's style bathroom and removed a very large jacuzzi bathtub that didn't function properly and was much too large (right photo), as well as a shower that was way too small (left photo below). 

Removal of the jacuzzi bathtub allowed us to put in a brand new spa tub and gave us room to work with to double the size of the shower. The shower now has a comfortable seating area, built in steam unit, and multiple shower heads, including a rain head. In addition to the changes to shower and tub, we provided a large double vanity with sinks, ionized water system for the client's personal use and a separate sit down vanity in the changing area directly off the master closet; giving the entire bathroom a spa-like feel (right photo below).

Picture
Picture
From start to finish the entire project took a little over 3 months, and our finished product speaks for itself in that we created a space that was very much the needs and wants of the individual client. 

We hope you enjoy these final photos, and the before and after comparisons. Please feel free to comment or contact us to offer feedback or discuss an design idea of your own.

Update: Transformation Of a Laguna Hills home

8/1/2014

 
In this post we’re going more in depth with parts of the project we discussed previously: the kitchen, the entryway and the master spa bath.
(Click any image to view larger)
Picture
Picture
Starting with the kitchen, we’ve removed old countertops, backsplashes, and the window and we’re prepping for our new finish as well as installing a new window.

There’s also a bar in the family room that needs to be addressed, and we’re stripping off the old finish (a dark stain that was poorly executed), sanding it and getting it ready for the new. 

In the kitchen we’re using a faux finish designed to look more like a real wood finish, though done on materials that are typically suited for paint, not stain.  
Next, we’ve removed the mirror in the entry, and created a new panel based on my design for the client. The panel you see in the photo will be stained to the match front doors, and a faux finish will go on the window frames around the 2 sidelights – giving the front entry a uniform look. 

Through all of this, while in production and we have multiple crews there on a daily basis and we manage them to successfully execute each phase of the project.
Picture
Picture
In the master bath upstairs we’ve abandoned the old tub completely because it was so dated, and the client wanted a more spa like bathroom. By doing this, it allowed us to increase the size of the shower, which will now be a spa-like feature with multiple shower heads, and a steam bath. Take a look at the new framing in the photo to the left to accommodate the new tub and shower layout. 
The spa tub that we’ve now dropped in is an air bath system designed to push warm air through small holes at the base of the tub so the whole experience becomes a warm bubbly sensation. In the photo above it’s being prepped and made ready for undermount installation.  (With an undermounted tub (or sink), you see only the bowl or vessel portion, but you don’t see any of the support. It’s done to give it more custom look.)
Picture
This brings us up to date so far as to where the project currently stands.

In the next blog we’ll be showing more of the finished product being worked on here, including: countertops, stonework produced for master spa bath, cabinets for the master spa bath, stages of our new finish for the kitchen.

Your comments and feedback are always appreciated, so please let us know what you think!

The transformation of a Laguna Hills home

7/15/2014

 
We’re midway thru the year and this is typically the time of year people start projects in anticipation of the fall season. Our new blog series is going to show how we can take an older home and bring it up to current standards. This home is located in Laguna Hills and was built in 1981. 

I’m going to be sharing with you before and after photos, in addition to photos that illustrate the process of what we do to transform an older home.

Picture
Take a look at the sketches we've created to help the client visualize the changes.
Picture
One of the first things we do is to sit down with the client and create a wish list or direction of where the client wants to take the home. In this particular project, they didn’t want to do a complete renovation on the kitchen, so the next option would be to provide a face-lift for the kitchen.
Picture
This is the kitchen in it's current state before the facelift.
The facelift will consist of new counters and backsplash, and for now we’re doing to do a re-finish of existing cabinets. However, we’re designing them in a way that if the client decides they want to do new cabinets down the road, we’re leaving that door open. 
We’d be able to keep the original bodies of the cabinets and they will have new faces put on them, and all new doors and drawers, essentially giving the kitchen a brand new look. 
The 2nd major portion of this remodel is the master suite where we are doing a complete renovation of the master bathroom. In this part of the project, I’ll show pictures of what the bathroom looks like in its current state, and drawings of what the proposed remodel will look like. Take a look at the actual photos before construction and during the process below.
This is going to be a step-by-step process where we take you through entire project of taking an older home and transforming it into today’s standards. 
Picture
Above: Original entryway with the mirror.


Right: Entryway in progress, after removal of the mirror.
Picture
There are existing difficulties in this house when it comes to technology, however we have a few creative solutions to work around them and provide the client with the same finished look as if this home were being built in today’s standards to include wiring for computers, home automation, flat screen TVs, etc. 

I'm looking forward to sharing more photos with you as the project progresses, so check back soon. 

Accessories

5/19/2014

 
Picture
The final stage of our ongoing client project is to choose the accessories. Previously, we added the final fabric for pillows to give the client’s room a unique feel. The fabric we chose for pillows really qualifies as an accessory. The direction for the accessories is two-fold; one to echo the contemporary feel of the furniture, and also to introduce pieces that had a unique or classic feel to them. 

In starting an accessory project, I start with an idea in my mind in terms of it’s final look. The right accessories are very similar to dressing properly. In buying a beautiful suite, what makes that suite even nicer are the finishing touches – such as a great pair of shoes, a belt, handbag, briefcase, watch or other accessories. 

I start with a visit to my suppliers who are part of my extensive library of resources.  Most of these resources are exclusive to the design trade, not open to the general public and are suppliers of unique, one-of-a-kind products.  

(Click any photo below to view a larger version)

I chose accessories with finishes that would enhance and dramatize our fabric selection and other materials. In this case, these finishes are antique bronze, hammered or burnished metals, warm rich, dark woods, and other materials with an earthy, natural feel to them. I selected antique pieces over new pieces with the exception of the large piece of contemporary art that went over the fireplace (seen in the center image above). I used rustic finishes for the lamps in our required lighting locations.

The cocktail table will be fairly clean and open, using an antique box for the centerpiece along with some artificial succulents. The client wanted the greenery, but didn’t want the maintenance of live plants. The artificial plants we use today are extremely life-like. 

I also picked an antique water pot and will use a pair of those on either side of the fireplace to anchor the opening of the fireplace. 

The finished product, when it’s put together, gives us an overall contemporary feel to the room with the simplicity of a few unique pieces that become the jewelry for the room.

We hope you’ve enjoyed this walkthrough blog series of our design project from start to finish. We’d be delighted to hear your feedback and comments!

Note: This is our final post in the our series that walks you through Rich's steps of project management. Thanks for following, and we're looking forward to bringing you more valuable design information in the months ahead!

Drapery

4/29/2014

1 Comment

 
Over the past few months, we've been producing a series of blogs that illustrate the process of creating exceptional interior design, from start to finish. We're getting closer toward the end of this series, with only a few posts left! In the following, we discover the process Rich uses to select the perfect drapery for his client. Read on and let us know what you think!

In choosing a drapery product, there are several aspects to be considered. The first is privacy; does the window covering need to provide semi-privacy or complete privacy. The second aspect is function, and this determines how the window covering operates. This could include blinds (which are typically raised horizontally or vertically, traverse draperies (drawn by a cord), or hand drawn draperies (led by a baton). Draperies might also be driven by electricity and be part of a whole house automation system.

The other important aspect to take into consideration is the type and style of products – this will be determined by how we respond to the first aspect: privacy.

In this project, Rich’s clients required two components to be considered. The client wants both under drapes made of a sheer fabric, which will be drawn across the windows all day. These will afford them privacy during the day. At night however, the sheer becomes very transparent when the lights inside the house are on. So, we have included over drapes that can be drawn for more complete privacy during the evening
.

The type and style of drapery the client selected will be a hand-drawn drapery for both unders (sheers) and overs (regular drapes) and will be operated by a hand baton. 

Picture


In keeping with our core contemporary design, the rods will be iron with a simple iron finial and will be done in a bronze finish.


The under drape will be a beautiful woven check sheer. The over drape is a faux-silk with velvet embroidery.

Now that the fabrics and function are selected by the client, the last thing to do is have the drapery installer come to the house to measure for yardage and get pricing for the client’s beautiful new draperies. Once this is approved, we’ll put them into production with the other furniture, and will have them installed on or before the furniture installation day for a completed look. 

Picture


Lastly, We added one more fabric as an accent pillow fabric to give the client the finished look they desire. 


Our last and final post on this project will be to discuss which particular accessories we’ll incorporate to the project. As always your comments and feedback are greatly appreciated. Please keep in mind that spring is here and if there’s anything IDS can help you with, please give us a call. 

1 Comment

Case Goods

3/10/2014

 
For our case good pieces (in this particular instance, they consist of wood and iron) Rich has selected those that have a clean line, but echo both traditional and contemporary elements.

On a whole, the lineage of the furniture is rooted more in the classic traditional style. But the finishes and the execution run toward a more contemporary direction.

Each of the pieces will be custom sized and custom finished to echo our warm neutral palate that we have executed for our upholstered pieces.
(see the original floor plan here, see the custom furniture pieces here)
Picture

The nice thing about doing custom pieces is that they can truly be modified to fit perfectly into our custom floor plan.

Our cocktail table and end table are custom iron pieces. with a unique finish for the iron that has an usual texture and color quality. The tops of the pieces are made of 3/4” travertine.


<< (design sample of cocktail and end table, with iron finish example, and travertine top sample)


Picture
We will have 2 custom cabinets that we’ll use on our floor plan to go behind the left and right ends of our sectional. These will add beauty and interest to the overall finished look of the room and also provide us a great location for our accent lighting – which is ultimately part of the accessory package (one of our last steps in the completion of this blog series).


Picture

The focal piece for the room will be a unique cabinet that will anchor our TV area, on the far side of the room. The carving on this piece creates a uniqueness about it that is both traditional and contemporary at the same time, and makes a great statement for the overall look of the room.


In terms of our overall production for all furnishings, we will start the manufacturing process around the same time. The goal is to have all the pieces completed in a 10-12 week time frame. By doing this we will deliver a completed room in one installation. This is a thrill for the client – as opposed to having furniture that is piecemealed – the client can live a normal life while the room is being created and they enjoy the gratification of completion when the pieces are all ready together.

At this point in the project, the client has come back  with an additional request for Rich – originally we were going to use their existing draperies that were in the room because they were relatively neutral and would work well with the fabrics the client had approved. However, after seeing how the room is coming together they decided they would like new drapes after all. So in our next post, we’ll be incorporating this and showing your some design ideas for the drapes as well as the fabrics we’ve selected.

As always, we would love your comments, feedback and questions!

Custom Furniture

2/8/2014

 
Our recent blog series has been focused on illustrating the design process from start to finish. This month, we're showing how Rich chooses the style and fabric of the custom furniture for the floor plan we showed you earlier. (Click here to see the original floor plan)

Now that we’re getting into the specifics of the design, we are creating completely unique pieces; being built specifically for the client’s home and needs. These furniture pieces designed by Rich cannot be bought in any store or showroom.
PictureSofa fabric color: Maize
The original look of the furniture that the client had was somewhat more traditional. However, they wanted to move toward a cleaner, more contemporary look, so we have selected furniture that has a little more tailored line to it.

The image to the left is the sofa design Rich has chosen, and the style of fabric to be used.

PictureChair fabric color: Cognac
For the chairs, we’re matching the style of the sofa, but changing the fabric to create more interest for our design.

It’s important that the relationship of the fabrics work well together in terms of color and texture.

Cognac, is the color choice, and was selected to bring out the warmer values that are in our sofa fabric.

Picture

Our final fabric is an accent fabric, which we’ll be using for pillows.

PictureCouch & chair fabrics, with wool rug & leather binding.
Lastly, all of our upholstered pieces are going to set in the room on top of our beautiful wool rug that will have a 2.5” leather binding around it.

The whole color palate is qualified as warm neutrals and this is the basis for all of our upholstered goods for the room.  In our next post we’ll be looking at our case goods – the wood pieces of this project.

As always, your comments and observations are welcomed and appreciated!

New Year, New projects.

12/11/2013


What's Involved in starting New projects?

The first 3 or 4 meetings with each of Rich's clients help to establish a direction for the project. Rich will meet you at your home to see what your lifestyle is like and will then sit down and discuss what particular project you have in mind – specifically, what the end use of that project will be.

A few typical questions Rich answers for you during these first meetings include:
  • How will you use the room? 
  • What activity is going to take place in the room?
  • How many people should the room accommodate?

After identifying the activities, Rich will determine the different elements that need to be addressed. There may a need for room modification (for example, to accommodate a multi-puropse room, making a kitchen & family room into one large room instead of two separate rooms, you may need to move a wall) or you may need to modify lighting and electrical, add a media & technology center, etc.

Following the identification of  the activity and determining the needed modifications, Rich then creates a floor plan of the room. See the illustration below:
Picture
Step 2 is to where Rich designs a furniture layout inside the floor plan drawing. Both the floor plan and furniture layout are done in scale, and 1/4" is to equal one square foot. This allows you to see how the furniture will  fit.

This sample room below has the main function of entertaining causally, also with the ability to watch a large screen TV. The requirements for this project were: seating for 6 to 8 people comfortably, a secondary TV area, and the primary area of the fireplace gathering on a somewhat formal setting. The floors are wood so a large custom area rug is the foot print for the room.

Picture
In our upcoming blog posts in the new year, we'll continue illustrating the process of how projects are planned, managed and brought to completion. Check back soon!

    Author

    Find out more about Rich Starley & his current projects here!

    Rich Starley Interior Design Blog

    Archives

    June 2015
    March 2015
    January 2015
    November 2014
    October 2014
    September 2014
    August 2014
    July 2014
    June 2014
    May 2014
    April 2014
    March 2014
    February 2014
    January 2014
    December 2013
    November 2013
    October 2013
    August 2013

    Categories

    All
    Accessories
    Before & After
    Drapery
    Fabrics
    Furniture
    How To's
    Outdoor Living
    Project Management
    Project Management

    RSS Feed