We're ready to unveil our finished project for our client in Laguna Hills. There were multiple changes throughout the whole house, however the biggest was bringing the look from a very tired 30 year old home, up to a fresher traditional look; updated with current fabrics, color trends in terms of our finishes, current stone, and other materials for our finished products.
The entry hall was an expansive area with a very traditional staircase, iron railing and wood handrail. My client didn't want to change this, but from a design standpoint it felt large, uninteresting and rather cold. Our solution was to bring in new wall covering and a new lighting fixture; making a dramatic impact when you first come in to the home.
The entry hall was an expansive area with a very traditional staircase, iron railing and wood handrail. My client didn't want to change this, but from a design standpoint it felt large, uninteresting and rather cold. Our solution was to bring in new wall covering and a new lighting fixture; making a dramatic impact when you first come in to the home.
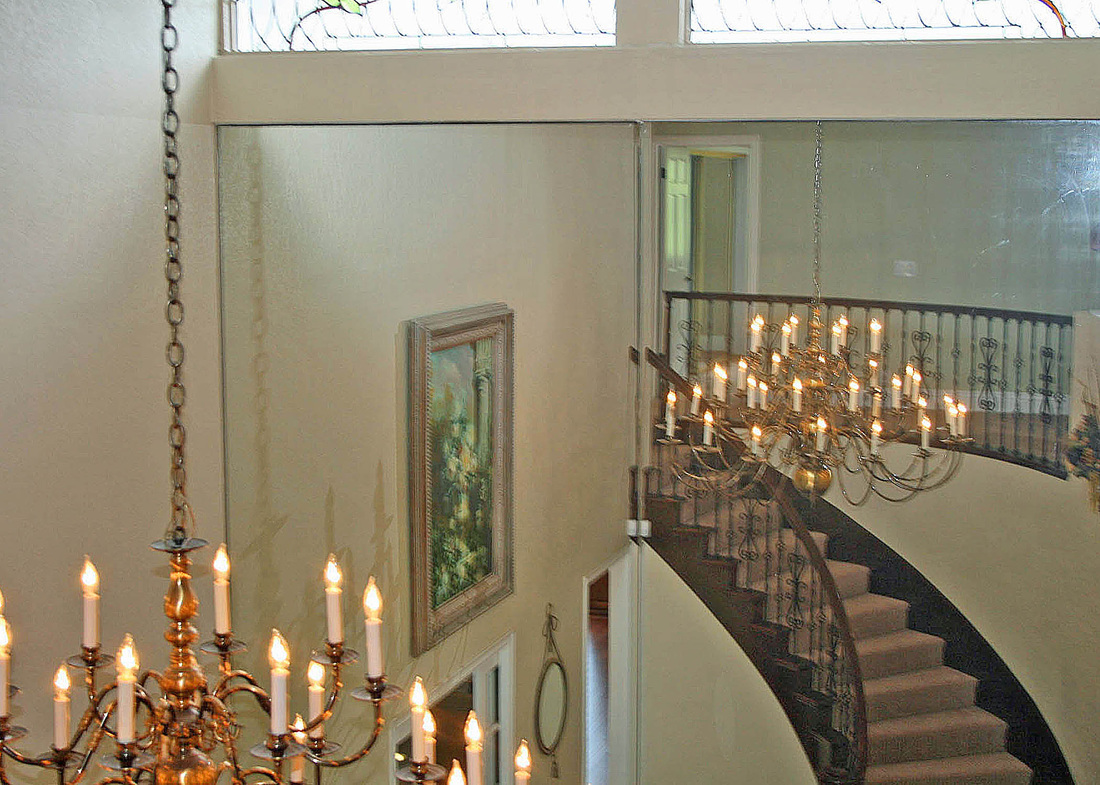 Above Photo: Entry before with large mirror above the front door. Right photo: Entry after project completion. | 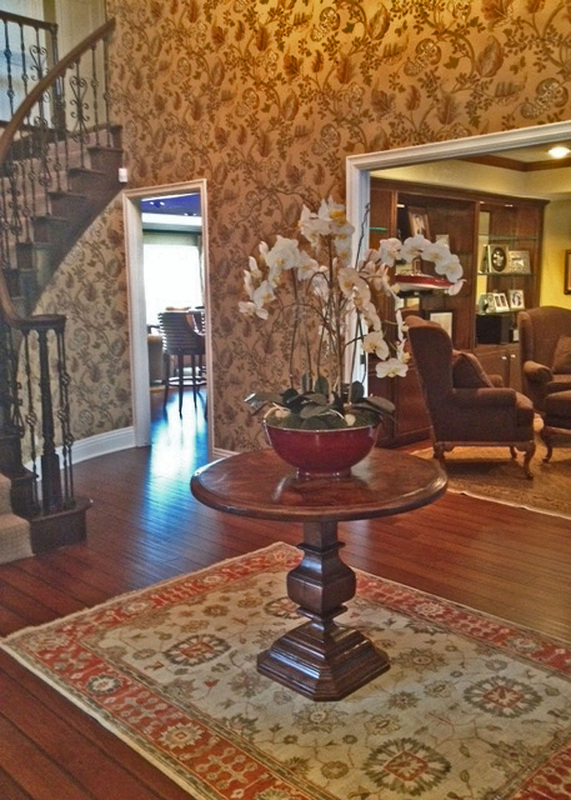 |
Our next biggest transition area was our kitchen where we had to work with 1930s style construction cabinetry. Since the client did not want to replace these, but did want a new look, we accomplished this by using a faux finish - ('faux' meaning a technique designed to replicate real wood or other material but done with paint in this particular case).
The new countertops were in granite, and the backsplash was a copper tile. We also provided new paint and furnishings.
The new countertops were in granite, and the backsplash was a copper tile. We also provided new paint and furnishings.
 Above Photo: Kitchen before Right photo: Kitchen after project completion. | 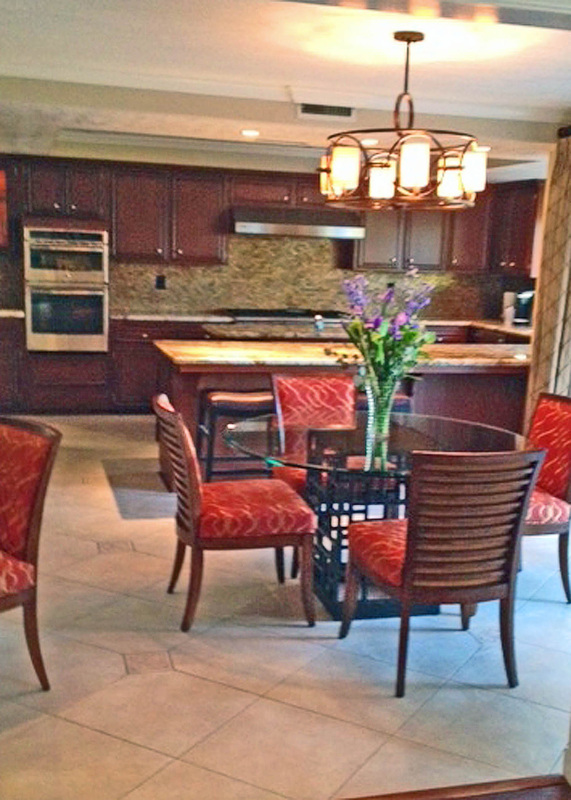 |
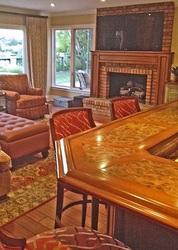 | In our family room we provided a new entertainment area which we incorporated a built-in fireplace, new furnishings, and the complete refinish and reface of the existing bar. We used a lot of the client's personal art and accessories to give this room a very comfortable lived-in look. (Left photo) |
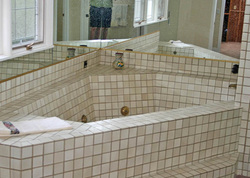
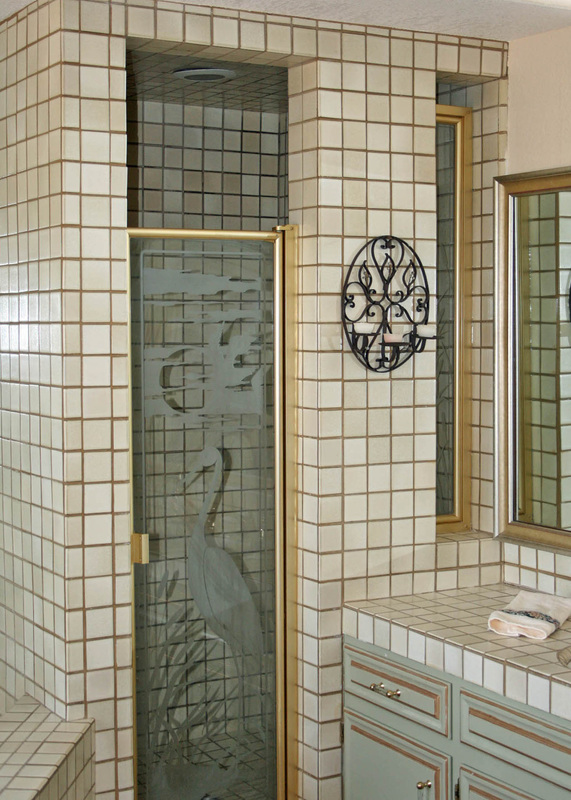
Next, in the upstairs master suite, the master bath required the largest portion of construction for the project. Here, we were able to demo the entire bathroom and start fresh. We took a very old 1930's style bathroom and removed a very large jacuzzi bathtub that didn't function properly and was much too large (right photo), as well as a shower that was way too small (left photo below).
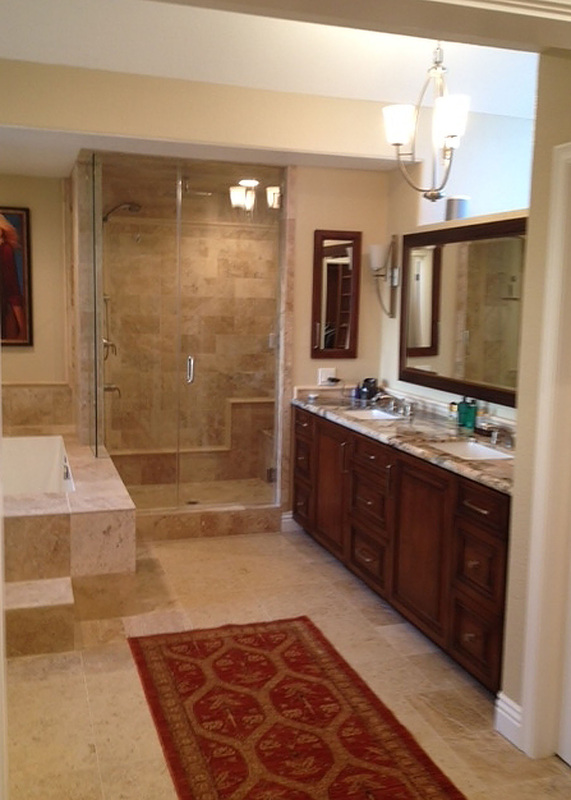
Removal of the jacuzzi bathtub allowed us to put in a brand new spa tub and gave us room to work with to double the size of the shower. The shower now has a comfortable seating area, built in steam unit, and multiple shower heads, including a rain head. In addition to the changes to shower and tub, we provided a large double vanity with sinks, ionized water system for the client's personal use and a separate sit down vanity in the changing area directly off the master closet; giving the entire bathroom a spa-like feel (right photo below).
Removal of the jacuzzi bathtub allowed us to put in a brand new spa tub and gave us room to work with to double the size of the shower. The shower now has a comfortable seating area, built in steam unit, and multiple shower heads, including a rain head. In addition to the changes to shower and tub, we provided a large double vanity with sinks, ionized water system for the client's personal use and a separate sit down vanity in the changing area directly off the master closet; giving the entire bathroom a spa-like feel (right photo below).
 |  |
From start to finish the entire project took a little over 3 months, and our finished product speaks for itself in that we created a space that was very much the needs and wants of the individual client.
We hope you enjoy these final photos, and the before and after comparisons. Please feel free to comment or contact us to offer feedback or discuss an design idea of your own.
We hope you enjoy these final photos, and the before and after comparisons. Please feel free to comment or contact us to offer feedback or discuss an design idea of your own.
 RSS Feed